how to decorate a christmas tree with ribbon
Introduction
velvet christmas ribbon.It’s the most wonderful time of the year! And with it brings the joy of decorating your holiday tree in all its glory. But how can you make it special? How do you bring that extra bit of sparkle to your home? Easy: add ribbon! Now, I’m not talking about just any old ribbon. I’m talking about fancy satin ribbon that makes your tree look like a princess castle—and believe me, when it comes to Christmas trees, this is exactly what we want. There are so many different ways to adorn a tree with ribbon, from bows at the top to just simply tying them around branches. So grab some scissors and let’s get started!
GET OUT THE RIBBON
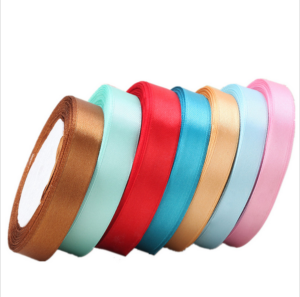
Velvet christmas ribbon comes in a variety of colors and patterns, so it’s easy to find one that matches your decorating scheme.Velvet christmas ribbon can be used to decorate the tree, wrap gifts, and make bows. It’s also available in a variety of widths and lengths.
- Ribbon comes in many colors and patterns; choose one that matches your decorating scheme.
- Ribbon can be used to decorate the tree or wrap gifts. You could also use it to make bows for presents or other decorations around the house!
START AT THE TOP
Here’s how to decorate a tree with ribbon:
- Start at the top. The first step is to wrap a large bow on the top of your tree. This can be made with a wide piece of ribbon or velvet ribbon, depending on your preferences and aesthetic. Wrap the bow so that one side overlaps slightly over another, then tie it off at the back with some loose ends hanging down for festive flair.
- Continue down in order from top to bottom, placing bows every few branches for full coverage and impact!
CUT LAYERS
Cut Layers
Once the ribbon is cut into strips, it can be used to create a layered tree look. Start by cutting two sheets of ribbon in different lengths. The first should be about three inches wide and the second about five inches wide. The longest piece will form the bottom layer of your tree, while the shorter pieces serve as “middle” layers. Cut each middle layer in half so that you have eight pieces total – four that are two inches long and four that are three inches long – and then lay them out on your work surface in alternating vertical rows:
- First row: one 3 inch piece followed by two 2 inch pieces
- Second row: one 5 inch piece followed by three 2 inch pieces
- Third row: one 7 inch piece followed by four 2 inch pieces
MAKE A BOW
For the first option, you will need a wide ribbon. For this tutorial, we chose to use a 3/8-inch wide ribbon that matches our tree perfectly.
For the second option, choose a narrow ribbon. We used 1/4-inch wide ribbon for this one and it looked great!
For the third option, you can pick a medium-sized gift wrap or Christmas decoration material that’s about as wide as your tree. We found some adorable gold glitter garland and it was perfect for our needs!
The fourth option is to choose an even narrower material if you have one—we chose 1/8-inch width so that it would fit on top of our gifts snugly rather than hang over them (it’s important not to cover any part of your creation; we want people who see it later know exactly what they’re looking at without having something else poke out).
THE TRICK TO MAKING A BOW
To make a bow, take a piece of ribbon that is at least twice as long as you want your finished bow to be. This will ensure that the end result is big enough and cute enough for you! The ribbon should also be at least 1 inch wide, so that it’s nice and sturdy. From there, all you have to do is tie knots in each side of the piece until it forms into something resembling a bow shape.
The important thing here is contrast! You don’t want all of your ribbons matching perfectly or else it’ll just look like one big blob on your tree; instead, use contrasting colors and patterns between each ribbon so they stand out against one another.
THREE TIPS FOR MAKING A PERFECT BOW
- Start with a large ribbon.
- Choose a ribbon width that is the same as the tree.
- Use a ribbon that has some stretch to it.
- Choose a ribbon that has some weight to it, but not too much; you want it to have stiffness so that you can manipulate it easily but still have some flow and movement in the bow when it’s finished.
LARGE RIBBON BOWS
Use a large ribbon. This can be any color you want—the more elaborate, the better! Use a big bow to tie around it. We recommend using a hot pink ribbon with an orange bow on top.
VELVET RIBBONS
Velvet ribbons are a delicate way to add some glamour to your tree. Here’s how to use them:
- Cut a length of velvet ribbon that’s about twice as long as you want your bow. Fold it in half, then take one end and wrap it around the other side of the folded piece.
- Pull tight, creating a loop at the top of your bow–this is where you’ll make your first knot!
- Make two more loops like this, moving down along the middle section until you reach where you started from; this will give your bow some shape! Tie each loop tightly with another strip of ribbon or string to hold everything together (you can use something like dental floss).Now comes time for adding decorations–I recommend hanging beads or other small items on both sides so that they cover up any loose ends (also makes it look neater!). For example:
decorating your holiday tree
Decorating your holiday tree with ribbon is a quick and easy way to add some pizzazz to your home. It’s also a great excuse for letting out your inner Martha Stewart!
- Use ribbon to make bows: Tie a length of ribbon around each branch, before winding it around the trunk of the tree. You can do this by hand or use a bow maker tool so that you get perfectly shaped bows every time.
- Make garlands from long lengths of narrow ribbons, wrapping them around branches and hanging them from the ceiling or doorway frames in different areas of your house.
- Create wreaths using wider ribbons in contrasting colors (like red, green and gold) which will look lovely on walls or doors as well as on top of fireplaces/stoves where they’ll catch light when candles are lit inside during special occasions like Christmas Eve dinners…
Conclusion
Hopefully, your Christmas tree will be the most beautiful one in town!
Itís difficult to find knowledgeable people in this particular subject, however, you seem like you know what youíre talking about! Thanks
Cheers